A Complete Guide to Flex Cracking Tester (Low Temperature) GT-KC11Feb 18, 2025
A Complete Guide to Flexing Cracking Tester (Low Temperature) GT-KC11
Are you struggling to evaluate the durability of flexible plastic sheet materials under low-temperature conditions? The Flexing Cracking Tester designed to assess the flex cracking resistance of materials when subjected to repetitive flexing at low temperatures.
Application of the Flex Cracking Tester (Low Temperature) GT-KC11
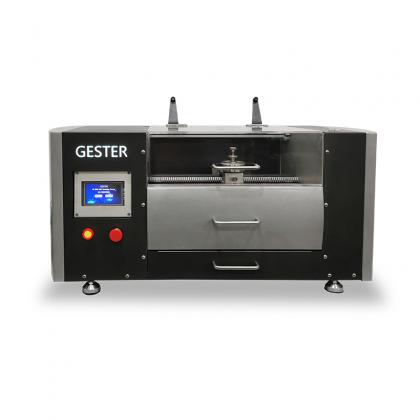
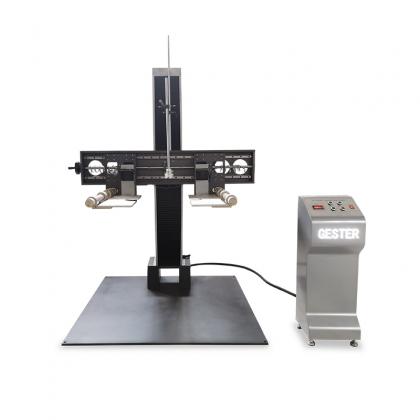
The Flexing Cracking Tester GT-KC11 is specifically designed to test the flexing cracking resistance of flexible plastic sheet materials under low-temperature conditions. It simulates real-world scenarios where materials are repeatedly flexed, ensuring they can withstand harsh environments without cracking or failing. This Low Temperature Flexing Tester is widely used in industries such as automotive, packaging, and construction, where material durability is critical.
Features of the GT-KC11 Flexing Cracking Tester
1. Durable Construction
Outer Chamber Material: Made of 2mm double-sided color-coated steel with a powder-coated surface for enhanced durability and aesthetics.
Inner Chamber Material: Constructed with SUS304 stainless steel, seamlessly welded and reinforced with 10mm steel plates to meet the structural strength requirements of bending tests.
2. Advanced Observation and Control
Vacuum Glass Observation Window: Allows for effective monitoring of the testing process without compromising the chamber’s temperature.
Temperature Control: Features a 7-inch color touch screen with Chinese and English language options for easy operation and precise temperature adjustments.
3. Efficient Cooling System
Equipped with two sets of mechanical compressors and a two-stage compression refrigeration cycle, the GT-KC11 Whole Shoe Flexing Freezing Chamber ensures quick cooling to the specified internal temperature, even with multiple fixture groups.
4. Intelligent Flexing System
Separate Controller: Includes power-off memory and automatic stop functions when the test is completed.
Corrosion-Resistant Fixtures: All testing fixtures are made of SUS304 stainless steel or aluminum, offering excellent corrosion resistance and anti-rust properties.
Step-by-Step Operation Guide
1. Open the Chamber Door
Begin by opening the door of the Whole Shoe Flexing Freezing Chamber to prepare for specimen installation.
2. Adjust the Test Stroke
Loosen the screw on the motor’s eccentric wheel.
Move the eccentric wheel within the slot to adjust the travel distance. The farther from the center, the longer the stroke.
Tighten the screw after setting the desired stroke.
3. Set the Grip Travel
Adjust the grip travel so that the minimum separation between the grips is twice the thickness of Type A specimens or four times the thickness of Type B specimens (when clamped), plus an additional 2mm.
The maximum separation should not exceed 20mm.
4. Install the Specimens
Type A Specimens: Clamp the specimens in the grips with a 20mm clearance, ensuring no prestress or compression is applied.
Type B Specimens: Fold the specimens with the side to be assessed facing outward, ensuring they measure 20mm x 40mm before clamping.
5. Close the Chamber Door
After installing the specimens, securely close the chamber door to maintain the test environment.
6. Set Test Parameters
Temperature: Set the desired low temperature for the test.
Test Cycles and Speed: Input the number of flexing cycles and the testing speed.
7. Start the Test
Click the [START] button to initiate the test. The Whole Shoe Flexing Freezing Chamber will automatically stop once the set number of cycles is completed.
8. Evaluate the Specimens
Remove the specimens and inspect them for any signs of cracking or damage.


 English