Comprehensive Guide for Using the Vertical Combustibility Tester GT-C35B October 09 , 2024
Comprehensive Guide for Using the Vertical Combustibility Tester

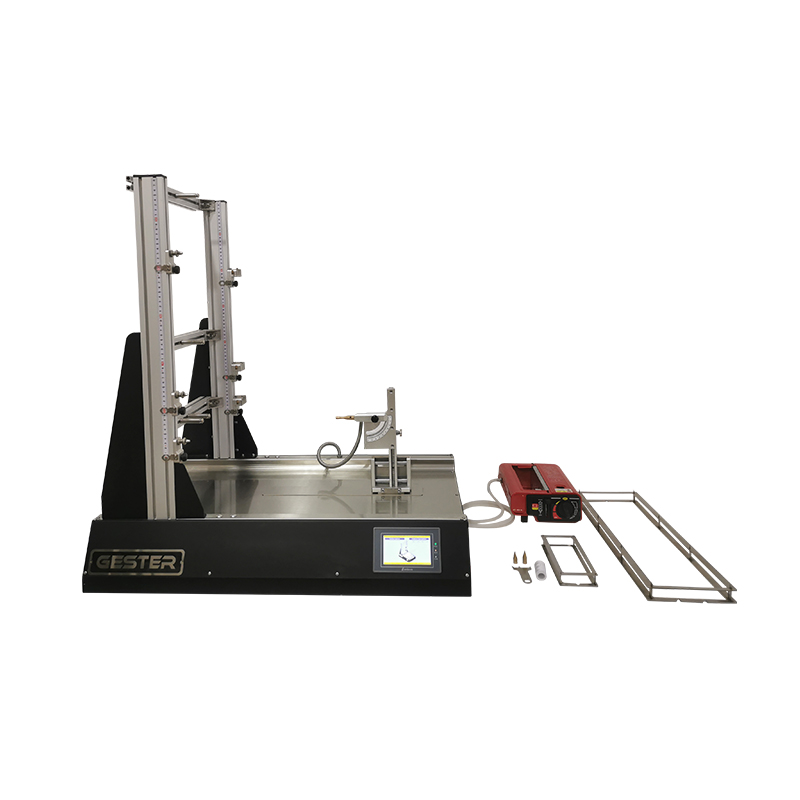
In the world of material safety testing, ensuring the accuracy and reliability of results is critical. The Vertical Combustibility Tester GT-C35B is an advanced instrument designed to determine the flammability of vertically oriented fabrics, making it ideal for textiles, soft fabric toys, and protective clothing industries. To maximize the effectiveness of this tester, proper training is essential. This article outlines the process of training customers to use the Vertical Combustibility Tester GT-C35B, while emphasizing the importance of after-sales support to ensure consistent performance and long-term reliability.


1. Understanding the Vertical Combustibility Tester GT-C35B
The GT-C35B Vertical Combustibility Tester is engineered to evaluate the flame resistance of materials. It is designed to comply with several international standards, including BS EN ISO 6940, 6941, 15025, 14116, and others, ensuring its global applicability.

2. Step-by-Step Training Process

Providing customers with a comprehensive training program is crucial for the optimal use of the Vertical Combustibility Tester GT-C35B. This step-by-step guide ensures that the user can accurately conduct tests and interpret results effectively:


Step 1: Sample Installation
Use the provided sample splint to mark a positioning hole on the material. This ensures that the sample is aligned correctly for testing.
After marking, install the sample securely on the sample clip. Proper alignment is critical for obtaining consistent and accurate test results.

Step 2: Hanging the Sample
Attach the sample to the tester’s frame, ensuring that it is suspended properly. This vertical orientation is essential for simulating real-life exposure to fire.

Step 3: Adjusting the Nylon Line
Adjust the scale line (marking line) by pulling the nylon line. The micro switch should be extended to a distance of approximately 5mm. This adjustment ensures that the nylon line is tight enough for the test procedure.

Step 4: Burner Angle Adjustment
The burner must be aligned at the correct angle to simulate fire exposure. Adjust the angle as per the material's requirements, ensuring consistent flame exposure throughout the test.

Step 5: Inserting the Copper Flame Gauge
Place Flame Gauge 1 (Copper) into the tester. This gauge helps measure the flame properties to ensure it meets the specified standards for testing.

Step 6: Positioning the Burner
Using the machine's controls, fine-tune the burner’s position in both vertical and horizontal planes. This precise adjustment ensures that the flame is directed accurately onto the sample.

Step 7: Burner Return to Default Position
After adjustment, press the return button to automatically return the burner to its default position, preparing it for the next test.

Step 8: Removing the Copper Flame Gauge
Once the burner has been positioned and calibrated, remove Flame Gauge 1 (Copper) to proceed with the test.

Step 9: Air Source Adjustment
Open the air source and adjust the airflow rate to match the testing parameters. Controlling the air source is crucial to maintaining the proper flame intensity during testing.

Step 10: Opening the Solenoid Valve
Activate the solenoid valve to ensure that the air supply to the burner is consistent and reliable throughout the testing process.

Step 11: Ignition and Flame Length Adjustment
Ignite the burner using the flow meter to adjust the flame length. For precision, use Flame Gauge 2 (Stainless Steel) to verify the flame length before commencing the test.

Step 12: Setting Ignition Time
Program the ignition time based on the material being tested. Different materials have varying resistance to fire, so this setting must be adjusted accordingly.

Step 13: Test Initiation
Press the start button to begin the test. The Vertical Combustibility Tester will automatically monitor the flame’s impact on the sample material.

Step 14: Completing the Test
The test concludes when all three marking lines on the material are burned through. This indicates that the material’s combustibility has been measured, and the data is ready for analysis.

By providing comprehensive training and superior after-sales support, customers can maximize the efficiency and effectiveness of this critical piece of testing equipment.
Leave A Message
If you are interested in our products and want to know more details,please leave a message here,we will reply you as soon as we can.

Home

Products

whatsapp